Sunday, June 30, 2013

Maintenance on Dell PowerEdge running ESXi

VMWare ESXi is really nice and easy to manage. Easy to create and maintain the VMs.
But as a bare-metal virtualization software, it makes several tasks a bit more complicated onto the server maintenance itself.
Should you have a “standard” OS such as Windows or Linux, there’s always packages to update drivers and firmware.
There’s no straightforward solution when running ESXi. We have to find a work around.
Also, the Open Manage Server Administrator to maintain the Dell server is not that simple anymore. We should have to add one more layer.

1. ESXi backup
Firs off, the backup.
I installed ESXi on an internal USB stick (8Gb). The server i configured to automatically boot on it.
That saves a little bit of space on hard drive, but it offers a much more nicer option. The backup. It is easier than it could look at a first glance.
I found a small and very efficient software to copy an entire USB stick as an image. It’s of course possible to restore it on an other USB stick (same size or greater).
Should your USB key burn out for some reason, just copy back your image to an other one, restart the server, and done !
Nothing more easy, find out more: http://www.alexpage.de/usb-image-tool/

2. Open Manage Server Administrator (OMSA)
Managing the OMSA on a server running can be a little bit tricky.
It must be done in two steps.
First , you should have an available server to host a webserver. Then install a small agent onto the remote ESXi host itself.

I have a very small CentOS guest OS (1Gb RAM defined, 10Gb hard drive) on my ESXi which host this webserver (this is also configured as a vmclient for some remote commands).

So, here I downloaded from the Dell support website (depends of the brand of server) the two pieces of software :
a) OpenManage Server Administrator Managed Node (RHEL6 - 64bit),v7.3.
That’s the webserver part. To be installed onto my CentOS guest OS.
b) OpenManageServer Administrator vSphere Installation Bundle (VIB) for ESXi 5.1,v7.3  
That’s the agent part to be installed on the remote ESXi host.

2.1 On the CentOS webserver host, I first uninstall any previously installed version of OMSA:
rpm -e $(rpm -qa | grep srvadmin)
Then, once extracted the tar.gz file, install the new one:
./setup.sh, choose default answer for Web Installation.

2.2 On ESXi, stop all the the VMs, put the host in maintenance mode, connect onto the host with ssh.
Under /vmfs/volumes/vm, create a new directory dedicated to the agent installer of OMSA, and copy inside, the new agent. Don’t unzip the given file.
Run the following command (here for the OMSA7.3):
esxcli software vib install -d /vmfs/volumes/506c2d23-01dbe48d-7940-001ec9deb63b/OM-SrvAdmin-Dell-Web-7.3.0-333_A00.VIB-ESX51i/OM-SrvAdmin-Dell-Web-7.3.0-333_A00.VIB-ESX51i.zip

Reboot the host, and check the new OMSA version:
esxcli software vib list|grep -i open
Exit the maintenance mode, restart the VMs you want to restart, here I restarted my CentOS guest hosting the webserver.
Finally, check the new version online (you may have to accept a new certificate from within the browser).

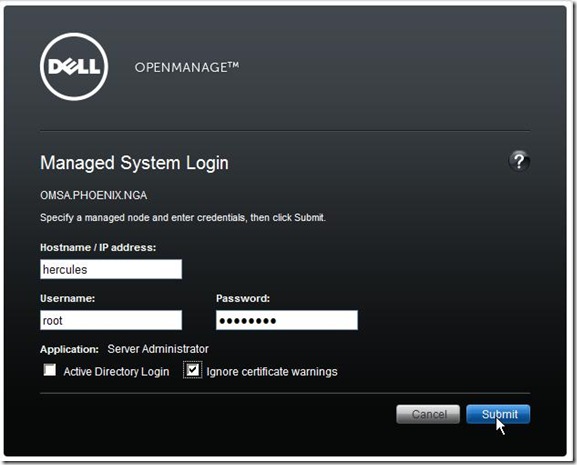
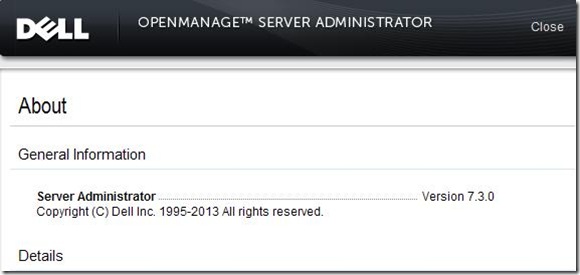
From the OMSA login page, the “About” gives the version of OMSA from the webserver side:
OMSA_002
OMSA_003

Connected to the managed host (the ESXi host):
OMSA_004

Once connected, click on the top right “About”, it will give the OMSA version from the managed agent (the ESXi host).
OMSA_005
OMSA_006     

3. Firmware update
This is probably the trickiest part and task to achieve. 
There’s no way to install any rpm on ESXi host, no way to run a direct single command to check the new firmware version from the Dell Support website.
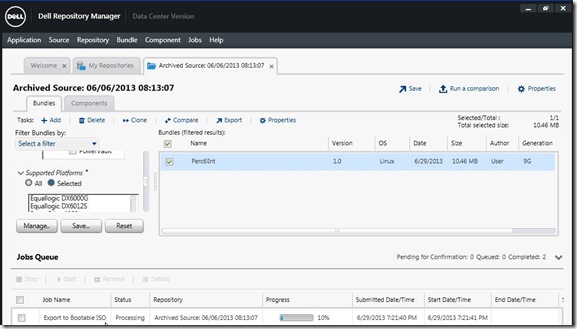
Until I discover a pretty  nice tool, Dell Repository Manager. It is supported only on Windows (2003 and above), quite easy to install. It allows us to create our own packages according to our hardware specificities from a bundle of firmware/drivers update.

Here below, I’ll work from an example which came out.
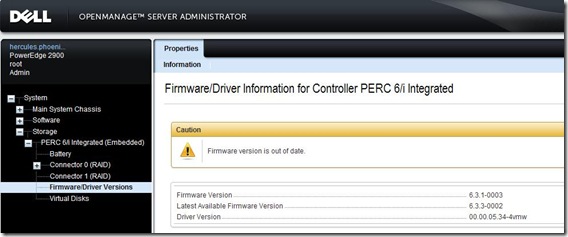
From the Open Manage Server Administrator, a new firmware version is reported for the Perc6i Integrated piece of hardware embedded on the PowerEdge 2900III server.

 DRM_001

This is obviously available in the Dell support website, you can download it, but there won’t be any way to run it from the ESXi host. From any of the guests OS neither, they have no idea about the hardware.

For the good of the example, let’s go to a Windows 2008R2 guest OS.
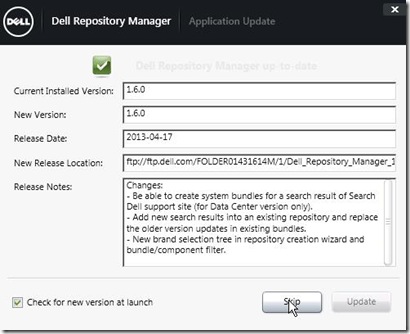
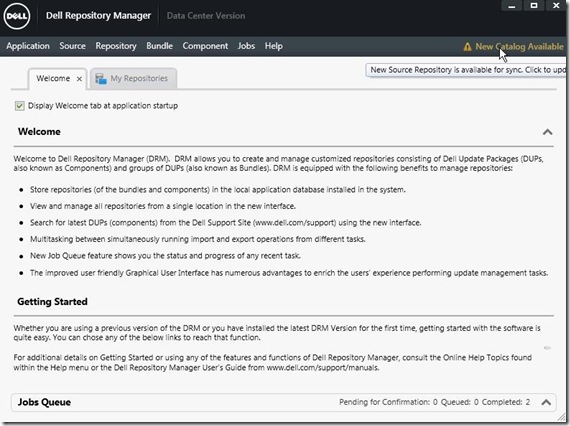
Open the Dell Repository Manager (DRM): 
DRM_002

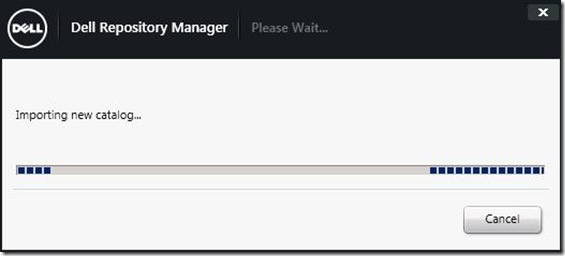
It checks for new catalog update immediately, download it.
DRM_003
 DRM_004

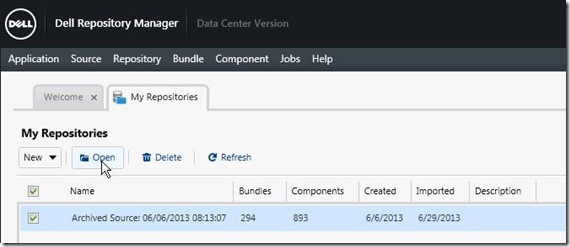
It creates a new repository with the newly imported catalog, open it.
DRM_005

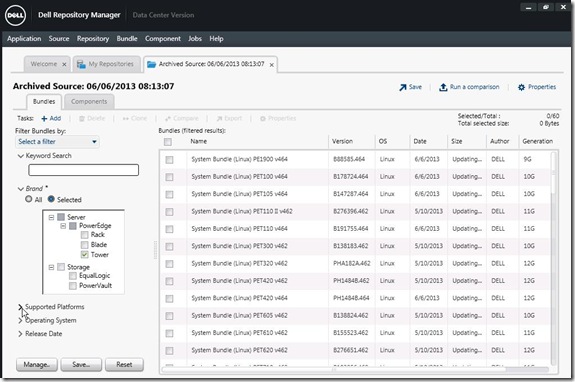
There’re now all the newest bundles available for the Dell servers.
Let’s select only and only the one(s) we could be interested of. My PowerEdge 2900III is a tower server:
DRM_006 

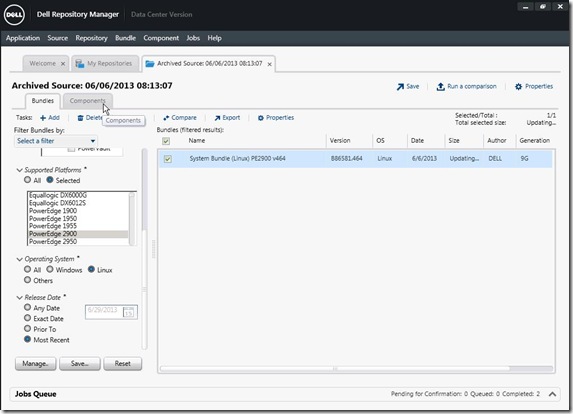
Choose your server brand, mine is a 2900 tower series, take the Linux OS and the most recent date. Only one bundle is now given (here the one from the 6th of June 2013):
DRM_008

You may want to export the bundle and create an ISO file right away, that’s quite possible and probably easier.
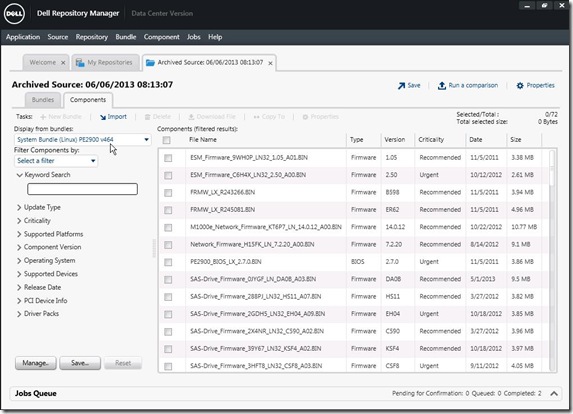
But I want to do it only the component update that I’m looking for (as shown above, Perc6i Integrated). Go to the Components tab, be sure the previously given bundle is selected:
DRM_009

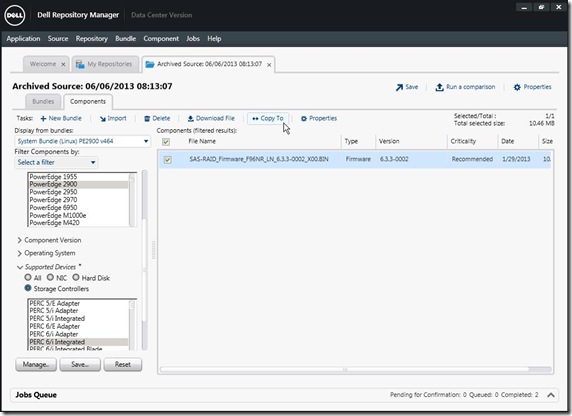
Again, select your brand of server, here tower server 2900, select the device you want the firmware for, here the Perc6i Integrated is a storage controller. It gives one and only one row, with the expected version as shown earlier by the OMSA alert (6.3.3-002, from the 29th of January 2013). See the size, it’s only 10Mb whereas the entire bundle was about 450Mb.
Select the component, and click on “Copy to”: 
DRM_011

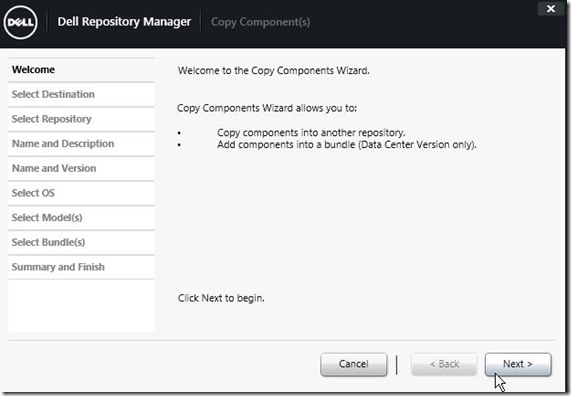
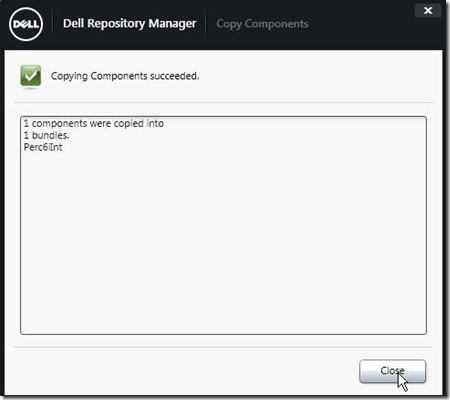
Now, we will create a new bundle from the selected component.
Here I have only one component but you may do the same for more components:
DRM_012

So, create the NEW bundle is what we want:
DRM_013

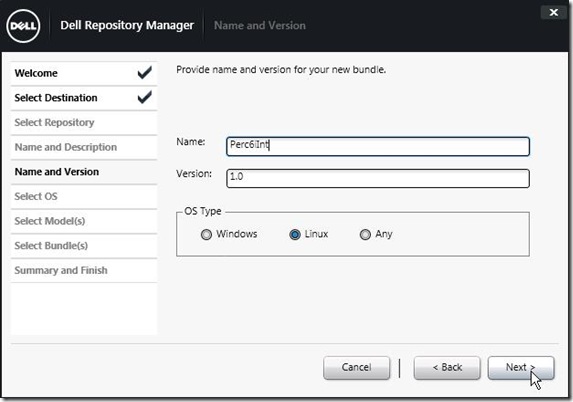
Choose a bundle name which say something to you for further reference. Choose Linux OS, here it’s a bundle specification, it will be use later to create the ISO file:
DRM_014

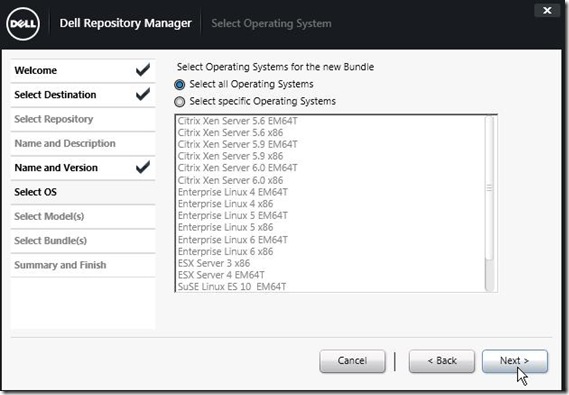
Do not select any of the specific OS:
DRM_015

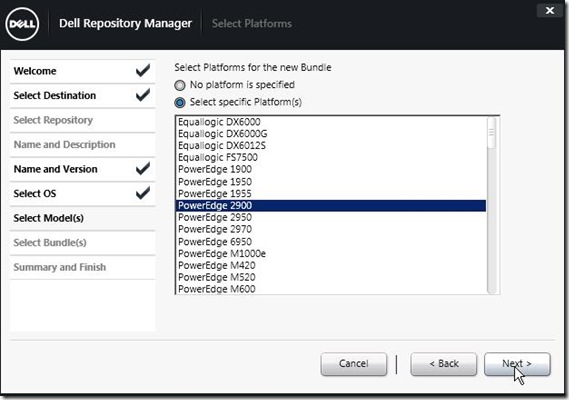
Once more select the server you want to update (surprisingly, it’s at least the third time we have to do it):
DRM_016

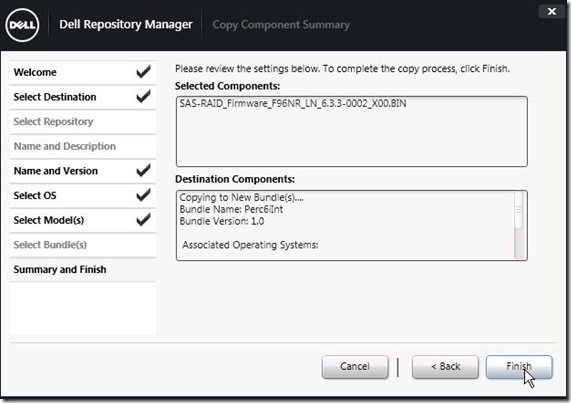
Check if everything is correct, and click “Finish”:
DRM_017

Finally, the bundle is created and ready to be exported:
DRM_018

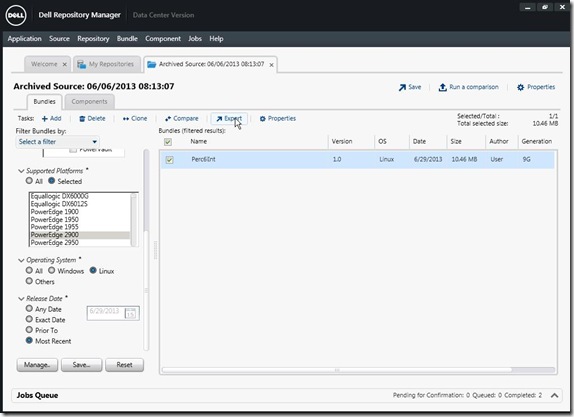
Go back to the “Bundles” tab, select the newly created bundle and click on “Export
DRM_019

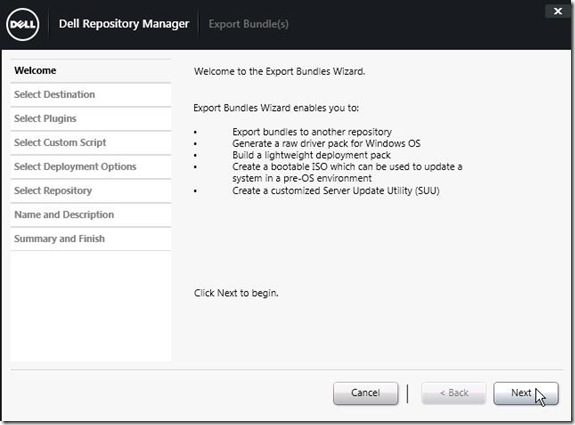
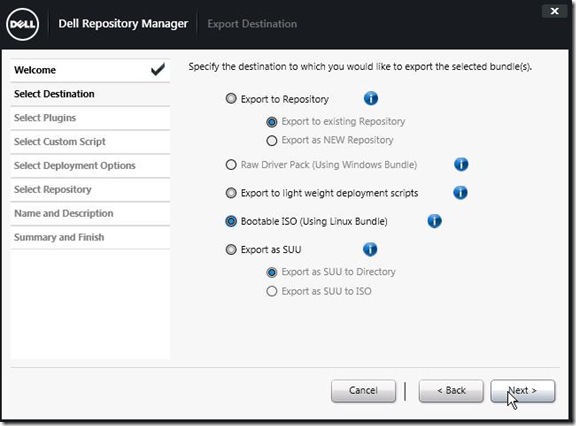
Now, we will create an ISO file that will be use to boot the server with and update the firmware. That would have been the case also if you exported the standard delivered bundle:
DRM_020

To do so, check the “Bootable ISO” option (remember, you created the bundle with Linux OS type):
DRM_021

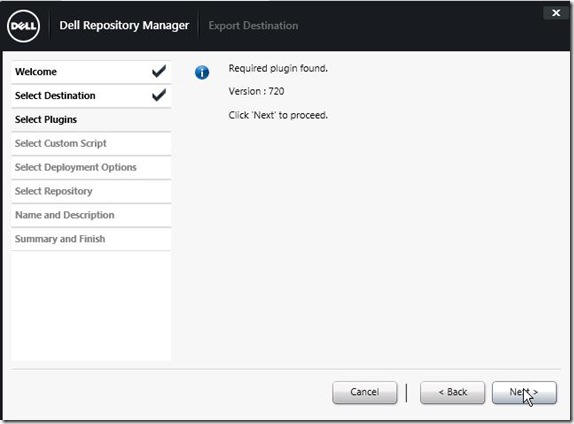
If any new plugins are detected, they are downloaded:
DRM_022

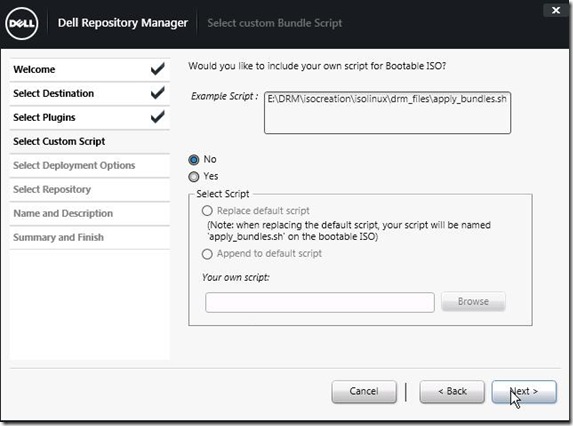
We do not have any customized script:
DRM_023

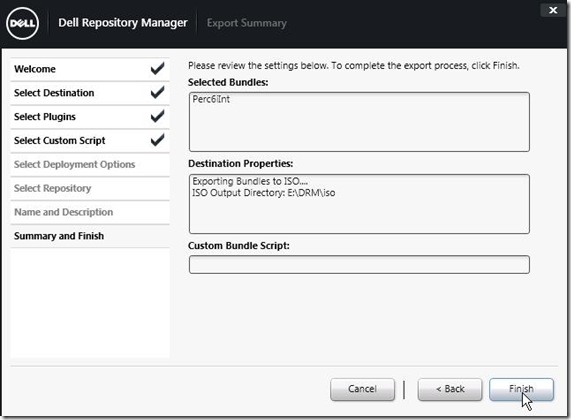
Happy ? Click “Finish”:
DRM_024

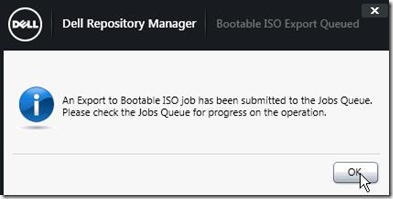
In the end of the process, a job is submitted:
DRM_025 

At the bottom of the page, check and wait for the job completion:
DRM_026

Once it is finished, we can check the file and size in the directory. Note the size, 200Mb, much more than the size of the component update (10Mb)…:
DRM_027
Burn the ISO as an image on a CD disk. 

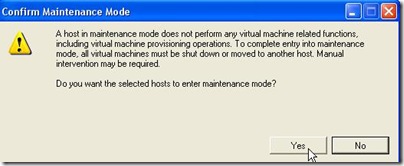
Put the ESXi in maintenance mode:
 DRM_028
DRM_029

Put the ISO disk in the server track and reboot the server:
DRM_030
DRM_031

After few seconds only (hey, only one component is updated here), the server is rebooted again from within the script (auto-executed from the ISO disk).
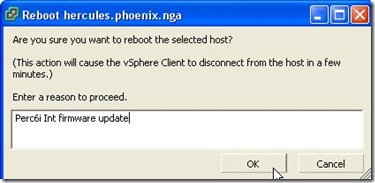
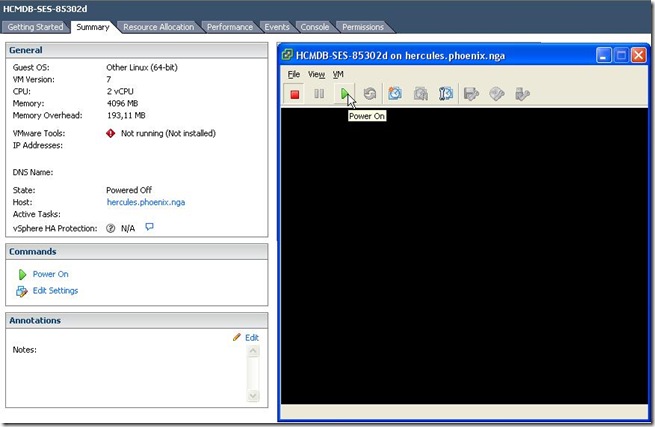
Remove the disk out of the track, exit the server from maintenance mode and restart the VMs you want to have up and running. Here I’m restarting the CentOS guest OS which host the OMSA webserver.
DRM_032

In the end, come back to OMSA and check the new version of the component which has been previously reported as obsolete. It is now the newest one:
DRM_033

Whether it looks tedious, it is not. There’re of course a lot of tasks, but it’s all for the good !

Enjoy,

Nicolas.

Wednesday, June 26, 2013

Oracle database 12c

Just in case you did not notice it yet, Oracle 12cR1 is now available…

Download is here : http://www.oracle.com/technetwork/database/enterprise-edition/downloads/index.html

And the documentation : http://www.oracle.com/pls/db121/homepage

You may want to read the new features first.
One of them has a quite interesting name “Performance With Zero Effort”, and hopefully title is not that misleading.

And of course, as announced before, there’s the Pluggable database feature. A new concept to learn, rather interesting to investigate to take advantage of.

So far, only available for Linux x64 and Solaris.

Nicolas.

Tuesday, June 25, 2013

Prompt-free Appliance deployment : the automation script

Fifth and last part of this series “Prompt-free Appliance deployment”. I’m sure, many of you didn’t understand why sending so much time and effort for such a small result.
It’s maybe right, but at least we learnt several interesting points regarding these Appliances, like :
* about the five disks and what they contain,
* for the VMWare users how to mount/umount one of the disks,
* where are all the scripts used for the VM configuration and what modifications are required to make them prompt-free
We can probably go even further in the analyzes, take only one or two disks out of the five (to make a VM for PIA only for instance), go further in the other script for other Peoplesoft components. But it would take even longer timer and effort. For those who are interesting in specific area, I hope that series offered a good start.

That said, there’s a very last effort. We previously modified the script manually, now it’s time for scripting. As a base start, I’ll reuse the previous script to move to ESXi.

1. Files involved
There are 3 files:
- 1 containing the sed replacement (replace.sed) – see explanations details in a previous post:
s/<OperatingSystemSection ovf:id="109">/<OperatingSystemSection ovf:id="101">/
s/<Description>Oracle_64<\/Description>/<Description>oracleLinux64Guest<\/Description>/
s/<vbox:OSType ovf:required="false">Oracle_64<\/vbox:OSType>/<vbox:OSType ovf:required="false">oracleLinux64Guest<\/vbox:OSType>/
s/<vssd:VirtualSystemType>virtualbox-2.2<\/vssd:VirtualSystemType>/<vssd:VirtualSystemType>vmx-07<\/vssd:VirtualSystemType>/
s/<rasd:Caption>sataController0<\/rasd:Caption>/<rasd:Caption>SCSI Controller0<\/rasd:Caption>/
s/<rasd:Description>SATA Controller<\/rasd:Description>/<rasd:Description>SCSI Controller<\/rasd:Description>/
s/<rasd:ElementName>sataController0<\/rasd:ElementName>/<rasd:ElementName>SCSI Controller0<\/rasd:ElementName>/
s/<rasd:ResourceSubType>AHCI<\/rasd:ResourceSubType>/<rasd:ResourceSubType>lsilogic<\/rasd:ResourceSubType>/
s/<rasd:ResourceType>20<\/rasd:ResourceType>/<rasd:ResourceType>6<\/rasd:ResourceType>/

- 1 containing the configuration settings.
This file is the only file to be modify when creating a new VM according to the expectations:
[root@omsa:/nfs/software/PeopleSoftCD/OVA]# more HCMDB-SES-85302d.env
#Please change the value as desired
ROOT_PWD="passw0rd"
IP_ADDRESS="192.168.1.20"
NETMASK="255.255.255.0"
GATEWAY="192.168.1.254"
DNS="192.168.2.254"
HOST_NAME="hcm92000.phoenix.nga"
DB_NAME="HR92DMO"
SES_Y_N="N"
VMWARE_ANNOTATIONS="Peoplesoft Appliance PUM HCMDB Peoplesoft 9.2 Peopletools 8.53.02 - Demo use"
VMWARE_TOOLS_ISO_PATH="/nfs/software/Virtualization/VMWare/VMWare_vSphere/5.1u1"
VMWARE_TOOLS_ISO_FILE="VMware-tools-linux-9.0.5-1065307.iso"
[root@omsa:/nfs/software/PeopleSoftCD/OVA]#

- 1 being the shell script itself, see next section.

2. The shell script
The first part is easy to understand, you must provide a configuration file as shown above
[root@omsa:/nfs/software/PeopleSoftCD/OVA]# more ova_to_esx.sh
if [ "$1" = "" ];
then
echo "You must specify a file as input parameter"
exit 1
else
ENV=$1
if [ -f ${ENV} ];
then
. ./${ENV}
else
echo ${ENV}" does not exists or is not a file"
exit 1
fi
fi

Then fill up the name of the input virtual machine as well as the output
inputVM=""
while [ "$inputVM" = "" ];
do
echo "Please enter input name (corresponding to the folder with zip/ova/ovf):"
read inputVM
if [ ! -d ${inputVM} ];
then
echo "The directory ./${inputVM} does not exist"
inputVM=""
fi
done

echo "Please enter the output VM name (default=${inputVM}): "
read outputVM
if [ "${outputVM}" = "" ];
then
outputVM=${inputVM}
fi

There is a confirmation prompt:
echo "########################################"
echo "#  Input parameters"
echo "########################################"
echo "inputVM ...............: "${inputVM}
echo "outputVM ..............: "${outputVM}
echo "Root password .........: "${ROOT_PWD}
echo "IP address ............: "${IP_ADDRESS}
echo "Netmask ...............: "${NETMASK}
echo "Gateway ...............: "${GATEWAY}
echo "DNS ...................: "${DNS}
echo "Hostname ..............: "${HOST_NAME}
echo "Database name .........: "${DB_NAME}
echo "SES installation ......: "${SES_Y_N}
echo "VMWare annotations ....: "${VMWARE_ANNOTATIONS}
echo "VMWare iso ............: "${VMWARE_TOOLS_ISO_PATH}"/"${VMWARE_TOOLS_ISO_FILE}
echo "########################################"
PROCEED=""
while [ "${PROCEED}" != "Y" -a "${PROCEED}" != "N" ];
do
echo "Do you want to proceed with these values (y=continue, n=exit)?"
read PROCEED
PROCEED=`echo "${PROCEED^^}"`
done
if [ ${PROCEED} = "N" ];
then
echo "You choose not to proceed, exit script."
exit 1
fi
echo "Continue the script..."

And all the following is running automatically, starting by unzipping, concatenate, extract ova file, update ovf file, and push to ESXi (ovftool):
##############################################################################################
cd ${inputVM}
echo $PWD

##############################################################################################
echo `date`
echo "Start"
#Unzip the input zipfiles
echo "Unzipping input files"
for zipfile in `ls ${inputVM}*.zip`
do
echo `date`
echo "unzipping file "$zipfile
unzip $zipfile
done

##############################################################################################
#Concatenation to one ova file
echo "Concatenation to one ova file"
if [ -f ${inputVM}.ova ];
then
rm -f ${inputVM}.ova
fi

for ovafile in `ls ${inputVM}.ova_?of?`
do
echo `date`
echo "concatenation file "$ovafile
cat $ovafile >> ${inputVM}.ova
done

##############################################################################################
#Extract files from ova
echo `date`
echo "Extract ova file"
if [ -f ${inputVM}.ova ];
then
echo "untar the ova file"
tar xvf ${inputVM}.ova
fi

##############################################################################################
#Backup the ovf
mv ${inputVM}.ovf ${inputVM}.ovf.orig

##############################################################################################
#Replace the string to be replace as defined in replace.sed file
echo "Change the ovf to ESXi compliance"
sed -f ../ova_to_esx.sed < ${inputVM}.ovf.orig > ${inputVM}.tmp

#Take the item line corresponding to the sound item group
line=`grep -ni -B7 sound ${inputVM}.tmp|grep  "<Item>"|awk -F- '{print $1}'`
#It will replace the <Item> for the sound card item to be deactivated
sed -e "${line}s/<Item>/<Item ovf:required=\"false\">/" < ${inputVM}.tmp > ${inputVM}.ovf
rm -f ${inputVM}.tmp

##############################################################################################
echo `date`
echo "Moving to ESXi"
##############################################################################################
#ovftool --lax -ds=vm "--net:HostOnly=VM Network 2" ${inputVM}.ovf "vi://root:pwd@192.168.1.10:443"
#Creation of the local ovftool parameter file
echo "lax" > .ovftool
echo "datastore=vm" >> .ovftool
echo "skipManifestCheck" >> .ovftool
echo "overwrite" >> .ovftool
echo "powerOffTarget" >> .ovftool
echo "net:HostOnly=VM Network 2" >> .ovftool
#echo "powerOn" >> .ovftool
echo "annotation="${VMWARE_ANNOTATIONS} >> .ovftool
echo "name="${outputVM} >> .ovftool

echo $PWD
#Run the ovftool to push the ovf and vmdk to ESXi
ovftool ${inputVM}.ovf vi://root:pwd@192.168.1.10:443

#Remove local ovftool parameter file
rm -f .ovftool

Then it’s taking back the 1st disk from the remote ESXi to the local machine:
##############################################################################################
echo "Loading the vmdk from ESXi "`date`
##############################################################################################

##Taking back the 1st vmfk
mkdir -p ${outputVM}-esxi
vifs --server 192.168.1.10:443 --username root --password pwd --get '[vm] '${outputVM}'/'${outputVM}'-flat.vmdk' ./${outputVM}-esxi
echo `date`

Mounting and updating all the needed scripts:
##############################################################################################
echo "Mounting the loaded vmdk from ESXi "`date`
##############################################################################################
#Mounting the downloaded vmdk on local
lo1=`losetup --find`
echo "Loop free "${lo1}
losetup ${lo1} ./${outputVM}-esxi/${outputVM}-flat.vmdk
start=`fdisk -lu ${lo1}|grep Linux|grep -v "*"|grep -v swap|awk '{print $2}'`
echo "Start offset "${start}
offset=`expr ${start} \\* 512`
echo "Size offset "${offset}
lo2=`losetup --find`
echo "Loop free "${lo2}
losetup ${lo2}  ${lo1} -o ${offset}
echo "Mounting fs..."
mkdir -p /mnt/${outputVM}
mount  ${lo2} /mnt/${outputVM} -o rw,user

##############################################################################################
echo "Backing up scripts"
#####################
#Backing up scripts
#####################
cp /mnt/${outputVM}/opt/oracle/psft/vm/oraclevm-template.sh /mnt/${outputVM}/opt/oracle/psft/vm/oraclevm-template.sh.orig
cp /mnt/${outputVM}/opt/oracle/psft/vm/oraclevm-template-db.sh /mnt/${outputVM}/opt/oracle/psft/vm/oraclevm-template-db.sh.orig
#####################

echo "Banner"
#####################
#Banner
#####################
mv /mnt/${outputVM}/opt/oracle/psft/vm/.banner /mnt/${outputVM}/opt/oracle/psft/vm/.banner.orig
#####################

echo "Database"
#####################
#Database
#####################
sed -i "s/.*Enter the name of the database.*//"  /mnt/${outputVM}/opt/oracle/psft/vm/oraclevm-template-db.sh
sed -i "s/read VALUE/VALUE=\"${DB_NAME}\"/" /mnt/${outputVM}/opt/oracle/psft/vm/oraclevm-template-db.sh

echo "Root password"
#####################
#Root password
#####################
sed -i "/.*ovm_configure_network.*/a\
sed -i \"s\/ovm_set_password.*\/ovm_set_password root "${ROOT_PWD}"\/\" \$ORACLE_DB_SCRIPT" /mnt/${outputVM}/opt/oracle/psft/vm/oraclevm-template-db.sh

echo "Network"
#####################
#Network
#####################
sed -i "s/.*ovm_configure_network.*/sed -i \"s\/ovm_configure_network.*\/ovm_configure_network "${IP_ADDRESS}" "${NETMASK}" "${GATEWAY}" "${DNS}" "${HOST_NAME}"\/
\" \$ORACLE_DB_SCRIPT/"  /mnt/${outputVM}/opt/oracle/psft/vm/oraclevm-template-db.sh

echo "SES"
#####################
#SES
#####################
if [ ${SES_Y_N} = "Y" ]; then
sed -n '1h;1!H;${;g;s/echo -n \"Do you wish to setup Secure Search Enterprise.*USER_RESPONSE=\"\$?\"/USER_RESPONSE=1/g;p;}' < /mnt/${outputVM}/opt/oracle/psft/vm/
oraclevm-template.sh > /mnt/${outputVM}/opt/oracle/psft/vm/oraclevm-template.sh.out
else
sed -n '1h;1!H;${;g;s/echo -n \"Do you wish to setup Secure Search Enterprise.*USER_RESPONSE=\"\$?\"/USER_RESPONSE=0/g;p;}' < /mnt/${outputVM}/opt/oracle/psft/vm/
oraclevm-template.sh > /mnt/${outputVM}/opt/oracle/psft/vm/oraclevm-template.sh.out
fi
rm -f  /mnt/${outputVM}/opt/oracle/psft/vm/oraclevm-template.sh
mv /mnt/${outputVM}/opt/oracle/psft/vm/oraclevm-template.sh.out  /mnt/${outputVM}/opt/oracle/psft/vm/oraclevm-template.sh
chmod a+rx  /mnt/${outputVM}/opt/oracle/psft/vm/oraclevm-template.sh

Making all the stuff for VMWare tools:
echo "VMWare tools"
#####################
#VMWare tools script, run only the first time
#####################
echo "if [ -f /tmp/"${VMWARE_TOOLS_ISO_FILE}" ]; then" > /mnt/${outputVM}/opt/oracle/psft/vm/vmware_tools.sh
echo "mkdir -p /mnt/vmware-tools" >> /mnt/${outputVM}/opt/oracle/psft/vm/vmware_tools.sh
echo "mount -o loop /tmp/"${VMWARE_TOOLS_ISO_FILE}" /mnt/vmware-tools" >> /mnt/${outputVM}/opt/oracle/psft/vm/vmware_tools.sh
echo "tar zxf /mnt/vmware-tools/VMwareTools*.tar.gz -C /tmp" >> /mnt/${outputVM}/opt/oracle/psft/vm/vmware_tools.sh
echo "umount /mnt/vmware-tools" >> /mnt/${outputVM}/opt/oracle/psft/vm/vmware_tools.sh
echo "rmdir /mnt/vmware-tools" >> /mnt/${outputVM}/opt/oracle/psft/vm/vmware_tools.sh
echo "rm -f /tmp/${VMWARE_TOOLS_ISO_FILE}" >> /mnt/${outputVM}/opt/oracle/psft/vm/vmware_tools.sh
echo "/tmp/vmware-tools-distrib/vmware-install.pl --default" >> /mnt/${outputVM}/opt/oracle/psft/vm/vmware_tools.sh
echo "rm -Rf /tmp/vmware-tools-distrib" >> /mnt/${outputVM}/opt/oracle/psft/vm/vmware_tools.sh
echo "fi" >> /mnt/${outputVM}/opt/oracle/psft/vm/vmware_tools.sh
#
chmod a+rx /mnt/${outputVM}/opt/oracle/psft/vm/vmware_tools.sh
#
sed -i "/CreateVirtualEnv$/a\
\$SCRIPT_PATH\/vmware_tools.sh" /mnt/${outputVM}/opt/oracle/psft/vm/oraclevm-template.sh
#####################
echo "Copy VMWare tools installer "`date`
#Copy the iso VMWare tools installer
cp ${VMWARE_TOOLS_ISO_PATH}"/"${VMWARE_TOOLS_ISO_FILE} /mnt/${outputVM}/tmp
##############################################################################################

Two more optional steps to fix previously found issues (you may add more):
#####################
#Optional: disabling SELINUX in /etc/selinux/config if empty
#####################
echo "Disabling SELINUX"
sed -i "s/^SELINUX=$/SELINUX=disabled/" /mnt/${outputVM}/etc/selinux/config

#####################
#Optional: smb configuration settings
#####################
echo "SMB netbios configuration"
cp /mnt/${outputVM}/etc/samba/smb.conf /mnt/${outputVM}/etc/samba/smb.conf.bkp
sed -i "s/netbios.*/netbios name = "${outputVM}"/" /mnt/${outputVM}/etc/samba/smb.conf

Once all the modifications are done, unmount everything and put back the 1st disk from local to remote ESXi:
##############################################################################################
echo "Dismounted all "`date`
echo "Umounting fs..."
##############################################################################################
umount /mnt/${outputVM}
echo "Freed loops..."
losetup -d ${lo2}
losetup -d ${lo1}
rmdir /mnt/${outputVM}

##############################################################################################
echo "Putting back the vmdk to ESXi "`date`
##############################################################################################
vifs --server 192.168.1.10:443 --username root --password pwd --put ./${outputVM}-esxi/${outputVM}-flat.vmdk '[vm] '${outputVM}'/'${outputVM}'-flat.vmdk'
rm -Rf ./${outputVM}-esxi

Eventually it’s starting up the new virtual machine and install the VMWare tools:
##############################################################################################
echo "Starting up the virtual machine..."
##############################################################################################
#Taking the ID of the new VM
VMID=`ssh 192.168.1.10 <<EOF
/bin/vim-cmd vmsvc/getallvms |grep " "${outputVM}" "
EOF`
VMID=`echo $VMID|awk '{print $1}'`
echo "ID virtual machine "${VMID}
#Taking the status of the new VM
VM_OFF=`ssh 192.168.1.10 <<EOF
/bin/vim-cmd vmsvc/power.getstate ${VMID}|grep "Powered off"|wc -l
EOF`
#Starting the new VM
if [ ${VM_OFF} -eq 0 ]; then
echo "The virtual machine ${outputVM} is already started"
else
ssh 192.168.1.10 <<EOF
/bin/vim-cmd vmsvc/power.on ${VMID}
EOF
fi
##############################################################################################
#If the VMWare tools are installed, then the VM is ready because it is the very last step of first VM starting up
##############################################################################################
echo "Waiting for initialization... Please be patient"
TOOLS=0
while [ ${TOOLS} -eq 0 ];
do
TOOLS=`ssh 192.168.1.10 <<EOF
grep toolbox: /vmfs/volumes/vm/${outputVM}/vmware.log|wc -l
EOF`
if [ ${TOOLS} -eq 0 ]; then
echo "Waiting for 60 seconds..."
sleep 60
fi
done
##############################################################################################
echo "The VM ${outputVM} is ready to use"
##############################################################################################
echo "End"`date`
cd -
[root@omsa:/nfs/software/PeopleSoftCD/OVA]#

It is ending the series on People Appliance prompt-free deployment.

Not sure if that script will be useful for many people and if it will work with the upcoming Demo Appliances, but what we can retain from this series:
* We heavily used “sed” command, it’s always good to manipulate.
* We came across mount disk issue and losetup command, it’s rather worth for Linux administrator.
* We use several interesting VMWare tool (ovftool) and VMWare client or host command lines (like the one to get/put file from/to ESXi, or start the VM).
* And also, we went through the configuration and settings of the virtual machines themselves (disks description, scripts used for deployment…).

So, whether it is really useful or not does not really matter, since it covered a wide scope of knowledge and tools, I hope many people learnt a piece of code which is out of their interest.

Nicolas.

Ref:
Password free access to ESXi host:
http://blogs.vmware.com/vsphere/2012/07/enabling-password-free-ssh-access-on-esxi-50.html
Starting a VM from command line:
http://kb.vmware.com/selfservice/microsites/search.do?language=en_US&cmd=displayKC&externalId=1038043
Check VMWare tools installed:
http://kb.vmware.com/selfservice/microsites/search.do?language=en_US&cmd=displayKC&externalId=1003947
Monday, June 17, 2013

Prompt-free Appliance deployment : start the VM

This second last part of the “Prompt-free Appliance deployment” is about showing up the very first start of the VM after script modification.
As we saw in a previous thread, there was some special steps to mount properly the disk to be able to modify the scripts.
So, here it’s much more simple:

1. Unmount the disk
[root@omsa:/nfs/software/PeopleSoftCD/OVA]# umount /mnt/HCMDB-SES-85302d

2. Free up the loop devices which have been mounted:
[root@omsa:/nfs/software/PeopleSoftCD/OVA]# losetup -d /dev/loop1
[root@omsa:/nfs/software/PeopleSoftCD/OVA]# losetup -d /dev/loop0

3. Push back the vmdk disk to ESXi:
[root@omsa:/nfs/software/PeopleSoftCD/OVA/HCMDB-SES-85302d]# vifs --server 192.168.1.10:443 --username root --password pwd --put HCMDB-SES-85302d-esxi/HCMDB-SES-85302d-flat.vmdk '[vm] HCMDB-SES-85302d/HCMDB-SES-85302d-flat.vmdk'
Uploaded file HCMDB-SES-85302d-esxi/HCMDB-SES-85302d-flat.vmdk to HCMDB-SES-85302d/HCMDB-SES-85302d-flat.vmdk successfully.
[root@omsa:/nfs/software/PeopleSoftCD/OVA/HCMDB-SES-85302d]#

4. Start the VM:

With the ESXi client, start the VM Appliance:
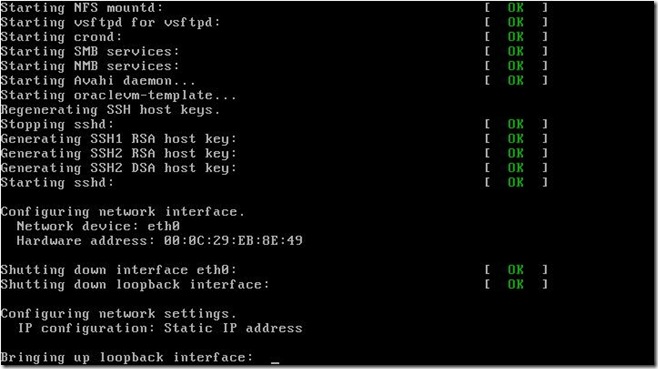
VDD_001

You won’t be prompted for the license agreement, no root password question…
VDD_004

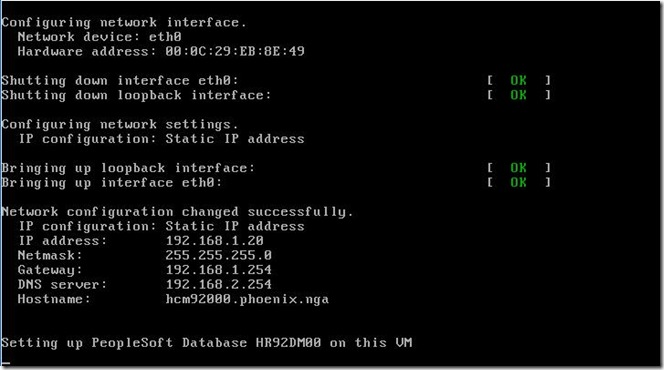
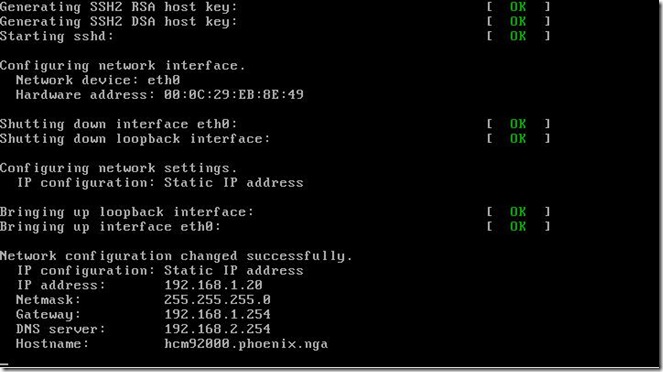
You won’t be prompted for the network settings neither:
VDD_005

The database name will be automatically filled in within the given name, and no question about SES installation anymore:
VDD_006

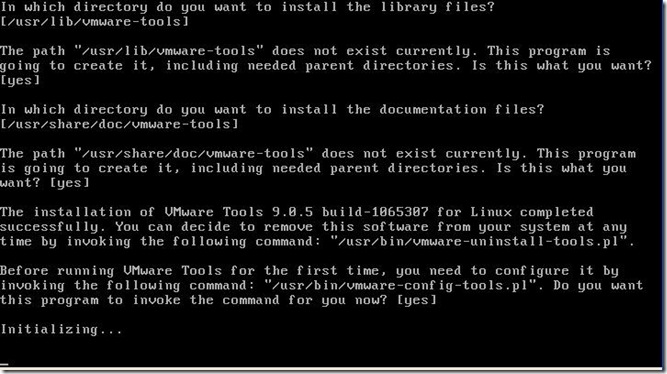
The VMWare ESXi tools will be installed automatically with all the default options:
VDD_007
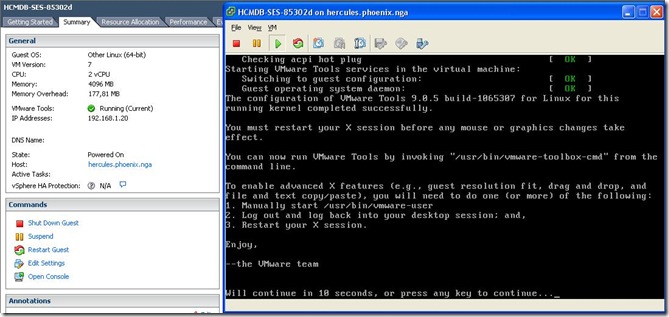
And finally, you can check the VMWare are installed without manually tasks:
VDD_009

Eventually, you can connect to the front end application: 
VDD_010

Now, we have to find a way to script everything, it will be describe in the next and last part.

Nicolas.

Thursday, June 13, 2013

Prompt-free Appliance deployment : scripts modification

In this third part of the “Prompt-free Appliance deployment” series, we will see what scripts have to be modified and how to suppress the prompt on the very first VM startup.

After mounting the disk as described in the previous step we can go further and one by one, take the prompt and the corresponding piece of script.

The main script is /opt/oracle/psft/vm/oraclevm-template.sh. Everything will start/end out there.

1. License agreement
This is the very first prompt you are facing to.
Most likely you want to respond yes, otherwise everything will stop right away.

Taken the file /opt/oracle/psft/vm/oraclevm-template.sh, we can easily see where this prompt comes from:
# display the banner if it exists and greater than 0 size
if [ -s $SCRIPT_PATH/.banner ]; then
    DISPLAY_BANNER=$(<$SCRIPT_PATH/.banner)
    echo ""
    echo "$DISPLAY_BANNER"
    echo ""
    echo -n "Do you want to proceed [y|n]: "
    GetYNResponse
    if [ $? == 0 ]; then
        # user decided not to proceed, exit the VM
        echo ""
        echo "You have decided not to proceed with the initialization, "
        echo "the VM will be shutdown now"
        echo ""
        ovm_press_anykey 5
        shutdown -hP now
    else
        echo ""
    fi
fi

And looking into the directory we can see that hidden file .banner:
[root@omsa:/mnt/HCMDB-SES-85302d/opt/oracle/psft/vm]# ls -la|grep banner
-r--r--r-- 1 root root   567 Apr  1 07:50 .banner
[root@omsa:/mnt/HCMDB-SES-85302d/opt/oracle/psft/vm]#

The content of the file is actually the prompt:
[root@omsa:/mnt/HCMDB-SES-85302d/opt/oracle/psft/vm]# more .banner
***SECURITY WARNING***

This virtual appliance has been constructed for ease of installation and
reduced setup time compared to a normal PeopleSoft installation using
downloaded media. It utilizes default user id and passwords throughout the
included tech stack in order to accomplish this.  If your installation
requires a more secure environment please utilize the information in the
Oracle Support Document 747524.1 (Securing Your PeopleSoft Application
Environment) which can be found at:

https://support.oracle.com/epmos/faces/DocumentDisplay?id=747524.1

The easiest way to supress the license agreement prompt will probably to rename this .banner file:
[root@omsa:/mnt/HCMDB-SES-85302d/opt/oracle/psft/vm]# mv .banner .banner.orig

2. The root password
If you read the script /opt/oracle/psft/vm/oraclevm-template.sh it is starting with calling a script /usr/lib/oraclevm-template/functions. This one actually contains a lot of functions which are called later on.
The one to set the password:

# Set password
# $1 - username
# $2 - password, if it's null, will prompt user to enter pasword
function ovm_set_password
{
    local username=$1
    local passwd=$2
    local encpasswd
    if [ -z "$username" ] || ! id "$username" >/dev/null 2>&1; then
        ovm_error "Username can't be null or does not exist."
        return 1
    fi
    if [ -n "$passwd" ]; then
        encpasswd=$(perl -e "print(crypt('$passwd','salt'),'\n')")
        usermod -p $encpasswd $username
    else
        while ! passwd $username; do
            :
        done
    fi
}

We need to call this function with username (root) and password. Please see part 5 below for the modification need.

3. Network settings
Similarly to the above with root’s password, the script /usr/lib/oraclevm-template/functions contains the function to configure the network:

# function ovm_configure_network
# Usage:
# 1. interactive mode
#  A. No argument specified. -  prompt user to select using DHCP or not.
#  B. $1 = "static" - force to configure static ip address.
#                     prompt user to enter ipaddress, netmask, gateway,
#                                          dns, hostname
# 2. silent mode
#  A. $1 = "dhcp", force to configure dhcp silently.
#  B. force to configure dhcp and set hostname silently.
#     $1 = "dhcp"
#     $2 = hostname
#  C. 5 arguments are required to configure static ip address silently.
#     $1 - ip address
#     $2 - netmask
#     $3 - gateway
#     $4 - dns server IP
#     $5 – hostname

Here, this function will need to be call with all the 5 parameters as described. Please see part 5 below for the modification need.

4. The database name
From the script oracle-template.sh, we can see the call to an other script, database dedicated:
#
# This function is called to setup a database on the local VM.
#
CheckCreateDBVirtualEnv() {

    RETURN_VALUE=0
    VBOX_SETUP=$1

    if [ -d $PS_DB_HOME ]; then
        . $SCRIPT_PATH/oraclevm-template-db.sh
        SourcePluginScript
        CreateVirtualEnvironment $VBOX_SETUP
        RETURN_VALUE=1
    else
        log_ovm_message "No PeopleTools Database environment to be created on this host ....skipping DB Setup"
    fi

    return $RETURN_VALUE
}

And, in this script, oraclevm-template-db.sh, the database name is defined as follow:
# get the current database name
DBNAME=`ls -l $PSFT_DB_HOME/oradata | grep '^d' | awk '{print $9}'`
DBSIDNAME=$DBNAME

if [ "$PROMPT_DBNAME" == "TRUE" ]; then
    # Prompt the user for database name
    GetUserInput
fi

The GetUserInput is actually a function:
GetUserInput() {

    echo ""
    echo -n "Enter the name of the database [$DBNAME]:"

    read VALUE
    if [ "$VALUE" != "" ]; then
        DBNAME=$VALUE
        DBSIDNAME=$DBNAME
    fi
}
To suppress the prompt, comment it out, and put the name you want:
GetUserInput() {

    echo ""
    #echo -n "Enter the name of the database [$DBNAME]:"

    #read VALUE
    VALUE="HR92DM00"
    if [ "$VALUE" != "" ]; then
        DBNAME=$VALUE
        DBSIDNAME=$DBNAME
    fi
}

5. Root password and network settings changes
Since the database is configured on this very virtual machine we are deploying, the root password and the network settings are both defined in the script oraclevm-template-db.sh.
It has already been modified for the database name (also see part 4 above when it is called).

Here, we can see the network function call:
# change the networking from static to variable
sed -i "s/ovm_configure_network \"static\"/ovm_configure_network/g" $ORACLE_DB_SCRIPT

It removes the “static” parameter to null… It should be change to put the 5 arguments needed to the network function as we’ve seen earlier. Also, whether there’s no the call to the password change function it must be change as well.
At the result we have the following:
# change the networking from static to variable
#sed -i "s/ovm_configure_network \"static\"/ovm_configure_network/g" $ORACLE_DB_SCRIPT
sed -i "s/ovm_configure_network.*/ovm_configure_network 192.168.1.20 255.255.255.0 192.168.1.254 192.168.2.254 hcm92000.phoenix.nga/" $ORACLE_DB_SCRIPT
sed -i "s/ovm_set_password.*/ovm_set_password root passw0rd/" $ORACLE_DB_SCRIPT

6. The SES installation
Finally, the last prompt your are seeing is the choice to install or not the Secure Enterprise Search (so called SES).
For this, we have to go back to the very first script, /opt/oracle/psft/vm/oraclevm-template.sh.
Here we go:
#
# This function is called to setup SES on the local VM.
#
CheckCreateSESVirtualEnv() {

    RETURN_VALUE=0
    VBOX_SETUP=$1

    if [ -d $PS_SES_HOME ]; then
        . $SCRIPT_PATH/oraclevm-template-search.sh

        USER_RESPONSE=1
        echo " "
        echo -n "Do you wish to setup Secure Search Enterprise (SES) on this VM [y|n]: "
        GetYNResponse
        USER_RESPONSE="$?"

        if [ "$USER_RESPONSE" == "1" ]; then
        CreateVirtualEnvironment $VBOX_SETUP

            # generate SES props
            PROP_FILE=$SCRIPT_PATH/ses.props
            echo DOMAIN_NAME=$APPSRVDOM >> $PROP_FILE
            echo DB_TYPE=$DBTYPE >> $PROP_FILE
            echo DB_NAME=$DBNAME >> $PROP_FILE
            echo DB_USER=$APPBATCH_PIA_USER >> $PROP_FILE
            echo DB_PWD=$APPBATCH_PIA_USER_PWD >> $PROP_FILE

            CheckConfigSES $PROP_FILE $IS_DEMO_SETUP $VBOX_SETUP
First you have to comment out the user input, and give the proper value to the parameter USER_RESPONSE depending you want to install it (1) or not (0). Here I don’t:
#
# This function is called to setup SES on the local VM.
#
CheckCreateSESVirtualEnv() {

    RETURN_VALUE=0
    VBOX_SETUP=$1

    if [ -d $PS_SES_HOME ]; then
        . $SCRIPT_PATH/oraclevm-template-search.sh

        USER_RESPONSE=1
        echo " "
        #echo -n "Do you wish to setup Secure Search Enterprise (SES) on this VM [y|n]: "
        #GetYNResponse
        #USER_RESPONSE="$?"
        USER_RESPONSE="0"

        if [ "$USER_RESPONSE" == "1" ]; then
        CreateVirtualEnvironment $VBOX_SETUP

            # generate SES props
            PROP_FILE=$SCRIPT_PATH/ses.props
            echo DOMAIN_NAME=$APPSRVDOM >> $PROP_FILE
            echo DB_TYPE=$DBTYPE >> $PROP_FILE
            echo DB_NAME=$DBNAME >> $PROP_FILE
            echo DB_USER=$APPBATCH_PIA_USER >> $PROP_FILE
            echo DB_PWD=$APPBATCH_PIA_USER_PWD >> $PROP_FILE

            CheckConfigSES $PROP_FILE $IS_DEMO_SETUP $VBOX_SETUP

7. VMWare tools
In the very end of the script, it could be very interesting to install automatically the VMWare tools without having to do it manually and without the need to mount a CD and so forth.

To achieve this, three steps:
7.1 Copy the iso file corresponding to your ESXi into /tmp
[root@omsa:/mnt/HCMDB-SES-85302d/opt/oracle/psft/vm]# cp /nfs/software/Virtualization/VMWare/VMWare_vSphere/5.1u1/VMware-tools-linux-9.0.5-1065307.iso /mnt/HCMDB-SES-85302d/tmp
[root@omsa:/mnt/HCMDB-SES-85302d/opt/oracle/psft/vm]#
[root@omsa:/mnt/HCMDB-SES-85302d/opt/oracle/psft/vm]# ls /mnt/HCMDB-SES-85302d/tmp
CVU_11.2.0.3.0_oracle  hsperfdata_oracle  hsperfdata_psadm3  logs  VMware-tools-linux-9.0.5-1065307.iso

7.2 Create a script to install the VMWare tools with all the default:
[root@omsa:/mnt/HCMDB-SES-85302d/opt/oracle/psft/vm]# more vmware_tools.sh
mkdir -p /mnt/vmware-tools
mount -o loop /tmp/VMware-tools-linux-9.0.5-1065307.iso /mnt/vmware-tools
tar zxf /mnt/vmware-tools/VMwareTools-9.0.5-1065307.tar.gz -C /tmp
umount /mnt/vmware-tools
rmdir /mnt/vmware-tools
rm -f /tmp/VMware-tools-linux-9.0.5-1065307.iso
/tmp/vmware-tools-distrib/vmware-install.pl --default
rm -Rf /tmp/vmware-tools-distrib
[root@omsa:/mnt/HCMDB-SES-85302d/opt/oracle/psft/vm]# chmod a+rx vmware_tools.sh


7.3 Modify /opt/oracle/psft/vm/oraclevm-template.sh and add the call to this new script
Within the main section, we can see the call to create the virtual environment:
main() {

    SetEnvVars

    SourcePluginScript

    if [ $# -eq 1 ] && [ "$1" == "--cleanup" ]; then
        CleanupVirtualEnv
    else
        if [ $# -eq 0 ]; then
            CreateVirtualEnv
        else
            UsageInstructions
        fi
    fi
}

Once it is all done, just run the VMWare tools script previously created:
main() {

    SetEnvVars

    SourcePluginScript

    if [ $# -eq 1 ] && [ "$1" == "--cleanup" ]; then
        CleanupVirtualEnv
    else
        if [ $# -eq 0 ]; then
            CreateVirtualEnv
            $SCRIPT_PATH/vmware_tools.sh
        else
            UsageInstructions
        fi
    fi
}

Here we saw all the modifications to make the VM starting without prompting for any user input, as it will be shown in the next and second last part of this series.
Whether the manual modification above are rather tedious, there will a script to do it for us, it will be the 5th and last part.

Nicolas.

Tuesday, June 11, 2013

Prompt-free Appliance deployment : mounting disk in r/w mode

As I expained in the previous blog entry, the intend of the “Prompt-free Applicance deployment” series is to avoid to enter manually all the VM details on the very first start. Whether there’re a lot of steps, in the end it all can be scripted.
It can be done by only one way: modification of the scripts started on VM startup. To do so, we must have access to the scripts which are hosted on one of the 5 given disks. As shown in that other blog entry, the first one is the one we want to go through.
Unfortunately, whether VMWare offers the utility vmware-mount, it cannot be in read/write mode, the vmdk being compressed.

There’s no straightaway and easy method. The only way I found is to push the VM to ESXi, get back the file corresponding to the first disk, mount it, modify the script, and push back the file.

Here we’ll see how to get back and mount the file corresponding to the first disk.

A) First of all, we should “push” the appliance to ESXi.

I’m using the tool OVFTool as below.
Create a local .ovftool file, it will be taken by the command line:
echo "lax" > .ovftool
echo "datastore=vm" >> .ovftool
echo "skipManifestCheck" >> .ovftool
echo "overwrite" >> .ovftool
echo "powerOffTarget" >> .ovftool
echo "net:HostOnly=VM Network 2" >> .ovftool
#echo "powerOn" >> .ovftool
echo "name="myVM_name >> .ovftool

Note that it should not be configured to start the VM automatically.
Then, run the command line:
ovftool inputVM.ovf vi://root:pwd@192.168.1.10:443


B) Second, get the file from ESXi.

Here we have first to check what is the file.
From ESXi server, we have something like:
/vmfs/volumes/506c2d23-01dbe48d-7940-001ec9deb63b/HCMDB-SES-85302d # ls -l
-rw-------    1 root     root     7543455744 Jun  5 19:12 HCMDB-SES-85302d-flat.vmdk
-rw-------    1 root     root           472 Jun  5 19:11 HCMDB-SES-85302d.vmdk
-rw-r--r--    1 root     root             0 Jun  5 19:11 HCMDB-SES-85302d.vmsd
-rwxr-xr-x    1 root     root          1766 Jun  5 19:11 HCMDB-SES-85302d.vmx
-rw-r--r--    1 root     root           271 Jun  5 19:11 HCMDB-SES-85302d.vmxf
-rw-------    1 root     root     5782896640 Jun  5 19:15 HCMDB-SES-85302d_1-flat.vmdk
-rw-------    1 root     root           479 Jun  5 19:12 HCMDB-SES-85302d_1.vmdk
-rw-------    1 root     root     36709597184 Jun  5 19:22 HCMDB-SES-85302d_2-flat.vmdk
-rw-------    1 root     root           479 Jun  5 19:15 HCMDB-SES-85302d_2.vmdk
-rw-------    1 root     root     13119782912 Jun  5 19:28 HCMDB-SES-85302d_3-flat.vmdk
-rw-------    1 root     root           479 Jun  5 19:22 HCMDB-SES-85302d_3.vmdk
-rw-------    1 root     root     18351128576 Jun  5 19:36 HCMDB-SES-85302d_4-flat.vmdk
-rw-------    1 root     root           479 Jun  5 19:28 HCMDB-SES-85302d_4.vmdk
/vmfs/volumes/506c2d23-01dbe48d-7940-001ec9deb63b/HCMDB-SES-85302d #

Disk one does not get any number, disk 2 is *_1, disk3 is *_2 and so on.

Within a simple command line, we can get it back to a local machine in a given directory:
vifs --server 192.168.1.10:443 --username root --password pwd --get '[vm] 'HCMDB-SES-85302d/HCMDB-SES-85302d-flat.vmdk' ./HCMDB-SES-85302d-esxi

Once done, on local machine:
[root@omsa:/nfs/software/PeopleSoftCD/OVA/HCMDB-SES-85302d/HCMDB-SES-85302d-esxi]# ls -l
total 7373864
-rw-r--r-- 1 root root 7543455744 Jun  5 21:49 HCMDB-SES-85302d-flat.vmdk
[root@omsa:/nfs/software/PeopleSoftCD/OVA/HCMDB-SES-85302d/HCMDB-SES-85302d-esxi]#


C) Now, mounting the file as a disk.

This is probably the trickiest past of that series. Well, unless you are a good Linux administrator.
We will use the Linux command losetup, from the man, here is a small explanation of what it is:
DESCRIPTION
       losetup  is  used  to associate loop devices with regular files or block devices, to detach loop devices and to query the status of a loop device.
Briefly speaking, mounting a flat file as a disk.

We should start by finding a free loop device:
[root@omsa:]# losetup --find
/dev/loop0
[root@omsa:]#

Then associating this loop device to the flat file:
[root@omsa:]# ls -l
total 7373864
-rw-r--r-- 1 root root 7543455744 Jun  5 21:49 HCMDB-SES-85302d-flat.vmdk
[root@omsa:]# losetup /dev/loop0 ./HCMDB-SES-85302d-flat.vmdk
[root@omsa:]#

We can now see the loop device as a result of a disk:
[root@omsa:]# fdisk -lu /dev/loop0

Disk /dev/loop0: 7543 MB, 7543455744 bytes
255 heads, 63 sectors/track, 917 cylinders, total 14733312 sectors
Units = sectors of 1 * 512 = 512 bytes
Sector size (logical/physical): 512 bytes / 512 bytes
I/O size (minimum/optimal): 512 bytes / 512 bytes
Disk identifier: 0x00064cf9

      Device Boot      Start         End      Blocks   Id  System
/dev/loop0p1   *          63      208844      104391   83  Linux
/dev/loop0p2          208845    10522574     5156865   83  Linux
/dev/loop0p3        10522575    14731604     2104515   82  Linux swap / Solaris
[root@omsa:]#

We recognize here the swap space as I describe a the previous post in the third partition, the first partition is the grub partition (see previous post for the content).
From the output above, we can say that the second partition is our.
The unit is 512 bytes, the starting point of the second partition is 208845. The starting offset of our partition will be 512*208845=106928640

We will be able to create a new loop device from the first within the computed offset:
[root@omsa:]# losetup --find
/dev/loop1
[root@omsa:]# losetup /dev/loop1 /dev/loop0 -o 106928640

Now we can really mount the disk itself from within the last loop device:
[root@omsa:]# mkdir /mnt/HCMDB-SES-85302d
[root@omsa:]# mount /dev/loop1 /mnt/HCMDB-SES-85302d -o rw,user

As of now, we will be able to go on the mount point and modify whatever we want. Any change will remains onto the disk.
For instance:
[root@omsa:]# cd /mnt/HCMDB-SES-85302d
[root@omsa:/mnt/HCMDB-SES-85302d]# ls
bin  boot  dev  etc  home  lib  lib64  lost+found  media  misc  mnt  opt  proc  root  sbin  selinux  srv  sys  tmp  u01  usr  var
[root@omsa:/mnt/HCMDB-SES-85302d]# cd tmp
[root@omsa:/mnt/HCMDB-SES-85302d/tmp]# touch test
[root@omsa:/mnt/HCMDB-SES-85302d/tmp]# rm -f test
[root@omsa:/mnt/HCMDB-SES-85302d/tmp]# cd ../
[root@omsa:/mnt/HCMDB-SES-85302d]# ls
bin  boot  dev  etc  home  lib  lib64  lost+found  media  misc  mnt  opt  proc  root  sbin  selinux  srv  sys  tmp  u01  usr  var
[root@omsa:/mnt/HCMDB-SES-85302d]# cd ./opt/oracle/psft/vm/
[root@omsa:/mnt/HCMDB-SES-85302d/opt/oracle/psft/vm]# ls
appbatch-start   expect-sftp     oraclevm-template-appbatch.sh  oraclevm-template-pia.sh     oraclevm-template-utils.sh  template-cleanup.sh
appliance.props  expect-ssh      oraclevm-template-db.sh        oraclevm-template-search.sh  ptem_variables.properties   tnsnames.ora
apply-hotfix.sh  installpia.sh   oraclevm-template-env.sh       oraclevm-template-ses.sh     README                      tnsnames.ora.exa
cmppropsfile.py  network-update  oraclevm-template-ext.sh       oraclevm-template.sh         sql                         updatepiahost.sh
[root@omsa:/mnt/HCMDB-SES-85302d/opt/oracle/psft/vm]# cp oraclevm-template.sh oraclevm-template.sh.orig
[root@omsa:/mnt/HCMDB-SES-85302d/opt/oracle/psft/vm]#

Ok, it will be serious time for script modification.
To be continued.

Nicolas.

Sunday, June 09, 2013

Prompt-free Appliance deployment : disks description

What I mean by prompt-free here ?
Well, simply not being prompted during the very first Peoplesoft Appliance VM startup. I find it rather annoying, especially if we have to do it on regular basis. Yes, we do have to commit the agreement, choose a root password, DHCP or fixed IP address, db name, SES... please see part 8 of this previous posts.
The beauty here is that without prompts we could have a script, schedule it in the evening (download files from MOS, doing all the required tasks to move to ESXi as I explained in an other blog entry, and start the VM; all automatically), come back the day after and the VM is ready to be used without anything else to do manually.

You could be right to say it's useless (and probably painful) since you always can create a VM and do snapshots or backup.
But you may also think about creating multiple VMs from the same appliance, where you should each time enter manually all the prompts with different IP address and hostname... I much prefer something like a configuration file defined in advance.
Needless to say it's a nice challenge. Don't you like challenge ?

Even if you are not interested by avoiding prompts, it's always interesting to investigate what Peoplesoft is providing to us for the PUM - Peoplesoft Update Manager - environment. It is finally worth to go through this (long) journey.
So, we will go through a 5 posts series to explain as much details as possible what need to be done.

The very first step is to get a picture of what is delivered.

As I explained in part 4 of the other post, the delivered OVA file is nothing but an archive of VMDKs (disks).
There are 5 of them. Which one is what ? What is the content and description of each disk ? This is what we need to define before going further.

The header of each files gives a first answer:
[root@omsa HCM92000]# for i in `ls HCMDB-SES-85302d-disk?.vmdk`; do head -27 $i >> vmdk.txt; done
[root@omsa HCM92000]# more vmdk.txt
KDMV

version=1
CID=dd143577
parentCID=ffffffff
isNativeSnapshot="no"
createType="streamOptimized"

# Extent description
RDONLY 14733312 SPARSE "HCMDB-SES-85302d-disk1.vmdk"

# The Disk Data Base
#DDB

ddb.longContentID = "19c1a3f4136bd9ec953c84f1dd143577"
ddb.encoding = "UTF-8"
ddb.comment = "Converted image from System.img"
ddb.uuid.parentmodification = "00000000-0000-0000-0000-000000000000"
ddb.uuid.modification = "00000000-0000-0000-0000-000000000000"
ddb.uuid.parent = "00000000-0000-0000-0000-000000000000"
ddb.uuid.image = "022ac6dc-7b31-4d2b-ab4c-3c71e5c9f1b5"
ddb.geometry.sectors = "63"
ddb.geometry.heads = "16"
ddb.geometry.cylinders = "14616"
ddb.adapterType = "ide"
ddb.virtualHWVersion = "4"
<...>
KDMV

version=1
CID=b38c7d38
parentCID=ffffffff
createType="streamOptimized"

# Extent description
RDONLY 11294720 SPARSE "HCMDB-SES-85302d-disk2.vmdk"

# The disk Data Base
#DDB

ddb.virtualHWVersion = "4"
ddb.adapterType="ide"
ddb.geometry.cylinders="11205"
ddb.geometry.heads="16"
ddb.geometry.sectors="63"
ddb.uuid.image="2190202e-f3a8-413b-be1c-50409d983202"
ddb.uuid.parent="00000000-0000-0000-0000-000000000000"
ddb.uuid.modification="00000000-0000-0000-0000-000000000000"
ddb.uuid.parentmodification="00000000-0000-0000-0000-000000000000"
ddb.comment="Converted image from Oracle11gR2.img"

<...>
KDMV

version=1
CID=c0b779ea
parentCID=ffffffff
createType="streamOptimized"

# Extent description
RDONLY 71698432 SPARSE "HCMDB-SES-85302d-disk3.vmdk"

# The disk Data Base
#DDB

ddb.virtualHWVersion = "4"
ddb.adapterType="ide"
ddb.geometry.cylinders="16383"
ddb.geometry.heads="16"
ddb.geometry.sectors="63"
ddb.uuid.image="a91009aa-d8f8-424a-b61c-1cdc5fd56eb5"
ddb.uuid.parent="00000000-0000-0000-0000-000000000000"
ddb.uuid.modification="00000000-0000-0000-0000-000000000000"
ddb.uuid.parentmodification="00000000-0000-0000-0000-000000000000"
ddb.comment="Converted image from HCMDB.img"

<...>
KDMV

version=1
CID=1d37be00
parentCID=ffffffff
createType="streamOptimized"

# Extent description
RDONLY 25624576 SPARSE "HCMDB-SES-85302d-disk4.vmdk"

# The disk Data Base
#DDB

ddb.virtualHWVersion = "4"
ddb.adapterType="ide"
ddb.geometry.cylinders="16383"
ddb.geometry.heads="16"
ddb.geometry.sectors="63"
ddb.uuid.image="b68f6e0b-4349-4d76-8f7e-29ab8c475d6d"
ddb.uuid.parent="00000000-0000-0000-0000-000000000000"
ddb.uuid.modification="00000000-0000-0000-0000-000000000000"
ddb.uuid.parentmodification="00000000-0000-0000-0000-000000000000"
ddb.comment="Converted image from TOOLS.img"
<...>

KDMV

version=1
CID=8ea5f943
parentCID=ffffffff
createType="streamOptimized"

# Extent description
RDONLY 35842048 SPARSE "HCMDB-SES-85302d-disk5.vmdk"

# The disk Data Base
#DDB

ddb.virtualHWVersion = "4"
ddb.adapterType="ide"
ddb.geometry.cylinders="16383"
ddb.geometry.heads="16"
ddb.geometry.sectors="63"
ddb.uuid.image="a44bf647-058d-4909-b4f5-781bea534e93"
ddb.uuid.parent="00000000-0000-0000-0000-000000000000"
ddb.uuid.modification="00000000-0000-0000-0000-000000000000"
ddb.uuid.parentmodification="00000000-0000-0000-0000-000000000000"
ddb.comment="Converted image from SES.img"
<...>

It looks like all the disks have been initiated on Oracle VM (see the comment, “Converted” as well as the extension file img in comment line is typically an Oracle VM template). Rather interesting, Oracle developed everything on Oracle VM and moved all to VirtualBox.

Each disk has its own dedicated area :
1st one, “Converted image from System.img”, this disk contains the all system OS and the required scripts used for the deployment. This is the one we should go deeper later on for what we have to do. That one is defined as IDE disk.
2nd one, “Converted image from Oracle11gR2.img”, the database installation software.
3rd one, “Converted image from HCMDB.img”, the database.
4rth one, “Converted image from TOOLS.img”, the Peopletools installation software.
5th one, “Converted image from SES.img”, the SES software installation.

So, to go further in the automation, we should go and investigate further into the 1st disk, used to host the system and boot drive.
I’m using VMWARE ESXi, there’s a nice and small utility, vmware-mount (coming with Virtual Disk Development Kit) to work on disk.
Let’s use it and see the disk in details:
[root@omsa:HCMDB-SES-85302d]# vmware-mount -p HCMDB-SES-85302d-disk1.vmdk
Nr      Start       Size Type Id Sytem
-- ---------- ---------- ---- -- ------------------------
1         63     208782 BIOS 83 Linux
2     208845   10313730 BIOS 83 Linux
3   10522575    4209030 BIOS 82 Linux swap
[root@omsa:/nfs/software/PeopleSoftCD/OVA/HCMDB-SES-85302d]#
Let’s forget the 3rd mount point, it’s nothing but swap space.
We should check the first two to see which one is our for scripts hosting.

About the first mount point:
[root@omsa:HCMDB-SES-85302d]# mkdir /mnt/HCMDB-SES-85302d
[root@omsa:HCMDB-SES-85302d]# vmware-mount HCMDB-SES-85302d-disk1.vmdk 1 /mnt/HCMDB-SES-85302d
[root@omsa:HCMDB-SES-85302d]# ls –l /mnt/HCMDB-SES-85302d
total 18912
-rw-r--r--. 1 root root   67258 Jul 25  2011 config-2.6.18-274.0.0.0.1.el5xen
-rw-r--r--. 1 root root   98997 Jul 28  2011 config-2.6.32-200.13.1.el5uek
drwxr-xr-x. 2 root root    1024 Apr  1 07:50 grub
-rw-------. 1 root root 3322413 Sep  9  2011 initrd-2.6.18-274.0.0.0.1.el5xen.img
-rw-------. 1 root root 2963880 Sep  9  2011 initrd-2.6.32-200.13.1.el5uek.img
-rw-------. 1 root root 2976036 Sep  9  2011 initrd-2.6.32-200.13.1.el5uek.img.pvhvm
drwx------  2 root root   12288 Sep  9  2011 lost+found
-rw-r--r--. 1 root root  115821 Jul 25  2011 symvers-2.6.18-274.0.0.0.1.el5xen.gz
-rw-r--r--. 1 root root  161244 Jul 28  2011 symvers-2.6.32-200.13.1.el5uek.gz
-rw-r--r--. 1 root root 1230605 Jul 25  2011 System.map-2.6.18-274.0.0.0.1.el5xen
-rw-r--r--. 1 root root 2437866 Jul 28  2011 System.map-2.6.32-200.13.1.el5uek
-rw-r--r--. 1 root root 2195174 Jul 25  2011 vmlinuz-2.6.18-274.0.0.0.1.el5xen
-rwxr-xr-x. 1 root root 3677280 Jul 28  2011 vmlinuz-2.6.32-200.13.1.el5uek
[root@omsa:HCMDB-SES-85302d]# vmware-mount -d /mnt/HCMDB-SES-85302d
Hmmm, nothing much interesting for us here.
And about the second mount point:
[root@omsa:HCMDB-SES-85302d]# vmware-mount HCMDB-SES-85302d-disk1.vmdk 2 /mnt/HCMDB-SES-85302d
[root@omsa:HCMDB-SES-85302d]# ls –l /mnt/HCMDB-SES-85302d/opt/oracle/psft/vm
total 200
-rwxr-xr-x 1 root root  3600 Apr  1 04:54 appbatch-start
-r--r--r-- 1 root root    32 Apr  1 07:50 appliance.props
-rwxr-xr-x 1 root root   366 Apr  1 04:54 apply-hotfix.sh
-rwxr-xr-x 1 root root 10195 Apr  1 04:54 cmppropsfile.py
-rwxr-xr-x 1 root root   521 Apr  1 04:54 expect-sftp
-rwxr-xr-x 1 root root   459 Apr  1 04:54 expect-ssh
-rwxr-xr-x 1 root root  4064 Apr  1 04:54 installpia.sh
-rwxr-xr-x 1 root root  1514 Apr  1 04:54 network-update
-rwxr-xr-x 1 root root 23945 Apr  1 04:54 oraclevm-template-appbatch.sh
-rwxr-xr-x 1 root root  5695 Apr  1 04:54 oraclevm-template-db.sh
-rwxr-xr-x 1 root root 17248 Apr  1 04:54 oraclevm-template-env.sh
-rwxr-xr-x 1 root root  3816 Apr  1 04:54 oraclevm-template-ext.sh
-rwxr-xr-x 1 root root 13853 Apr  1 04:54 oraclevm-template-pia.sh
-rwxr-xr-x 1 root root  2230 Apr  1 04:54 oraclevm-template-search.sh
-rwxr-xr-x 1 root root     0 Apr  1 04:54 oraclevm-template-ses.sh
-rwxr-xr-x 1 root root 21569 Apr  1 04:54 oraclevm-template.sh
-rwxr-xr-x 1 root root 28642 Apr  1 04:54 oraclevm-template-utils.sh
-rwxr-xr-x 1 root root  2146 Apr  1 04:54 ptem_variables.properties
-rwxr-xr-x 1 root root  4649 Apr  1 04:54 README
drwxr-xr-x 2 root root  4096 Apr  1 05:36 sql
-rwxr-xr-x 1 root root  1586 Apr  1 04:54 template-cleanup.sh
-rwxr-xr-x 1 root root   140 Apr  1 04:54 tnsnames.ora
-rwxr-xr-x 1 root root   175 Apr  1 04:54 tnsnames.ora.exa
-rwxr-xr-x 1 root root  3495 Apr  1 04:54 updatepiahost.sh
[root@omsa:HCMDB-SES-85302d]# vmware-mount -d /mnt/HCMDB-SES-85302d
[root@omsa:HCMDB-SES-85302d]# rmdir /mnt/HCMDB-SES-85302d
Yeap, here we go. It contains all what is used during the Appliance deployment. This is the one we want to go to through if we want to go further in the vm scripts modifiation.
NB: we could do the same exercise of mounting other disk (2, 3, 4, and 5) to check their exact content, but it’s not really what we are looking for right now, we have enough information.

We could go straight away, but it’s not that simple. The given vmdk are “compressed”. The utility vmware-mount can only mount the disk in read only mode ! Not very useful if we want to modify the content.

In the next step, we will have to find a workaround which allow the files modification.

Nicolas.